group assignment
      do your lab's safety training
      test runout, alignment, fixturing, speeds, feeds, materials,
         and toolpaths for your machine
individual assignment
      make (design+mill+assemble) somethingbig (~meter-scale)
extra credit: don't use fasteners or glue
extra credit: include curved surfaces
The CNC week, I was more excited than anything because you know finally something I can understand and put my design brain into good use
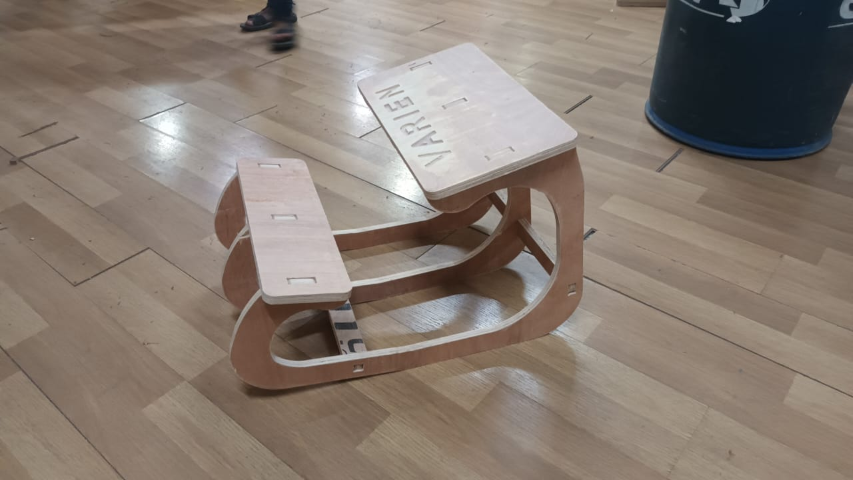
I wouldn’t say I did something extraordinary as much as I wish I had, at least I managed to do something ordinary within the given time.
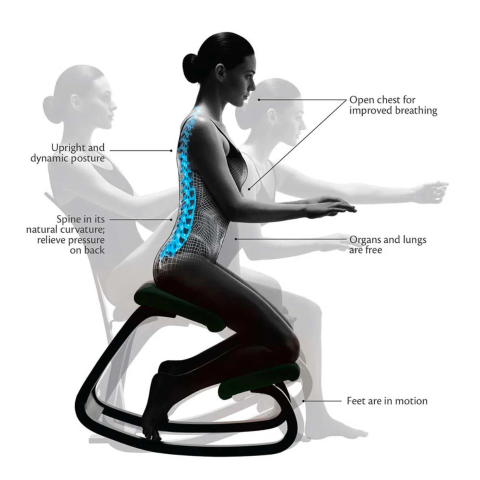
While I was looking for ideas I came across the kneeling chair. It is a simple design yet very useful. I have always admired such design
So before we dive into the details of the week I’d like to give you some idea about this beautiful design.
The principle of kneeling chair was originally invented by Hans Christian Mengshoel In 1979 It was later used to develop chairs by Three Norwegian designers, Oddvin Rykken,
Peter Opsvik
, and Professor Svein Gusrud developed chairs
The kneeling chair is meant to reduce
lower back
strain by dividing the burden of one's weight between the shins and the buttocks.
As its name suggests, the chair
allows for variation in all kinds of different positions
. Its curved runners allow for gentle rocking motions while a tilted seat enables an open hip angle. The two cushions beneath the seat can be used to rest your shins, one foot, both, or neither by placing your feet on the ground.
Kneeling chairs can
improve core strength
. Sitting in this posture requires engaging the abdominal and back muscles to maintain balance and stability. This subtle, continuous muscle engagement can strengthen core muscles over time, further supporting the spine and improving overall posture
Designing
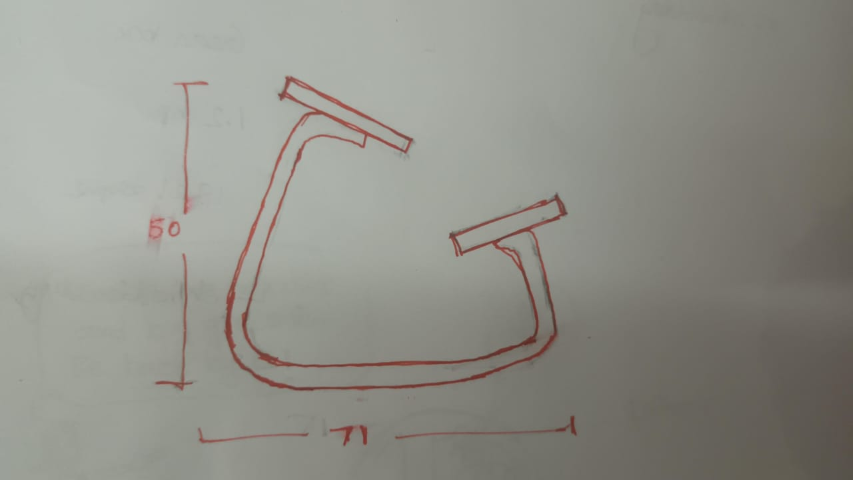
So I started of with making a rough sketch of the kneeling chair.
My contribution to the design I would say was in trying to make it into pressfir which was’nt really that big of a deal
While I maintained the overall shape and angle of the original design I made adjustments to the thickness and curvature of the leg to ensure that it’s structurally stable through discussion with our instructor mufeed.
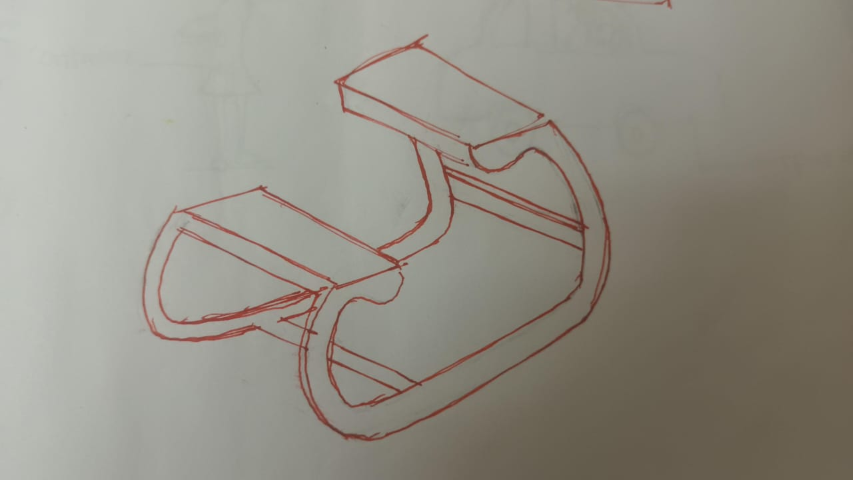
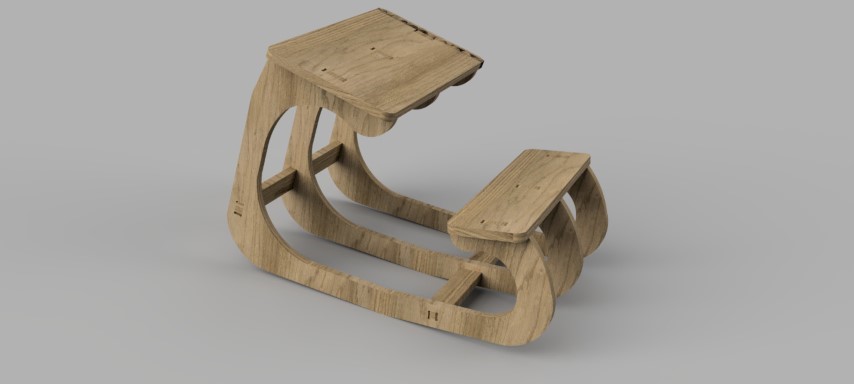
After initial sketches, I started designing in fusion 360
designing in fusion 360
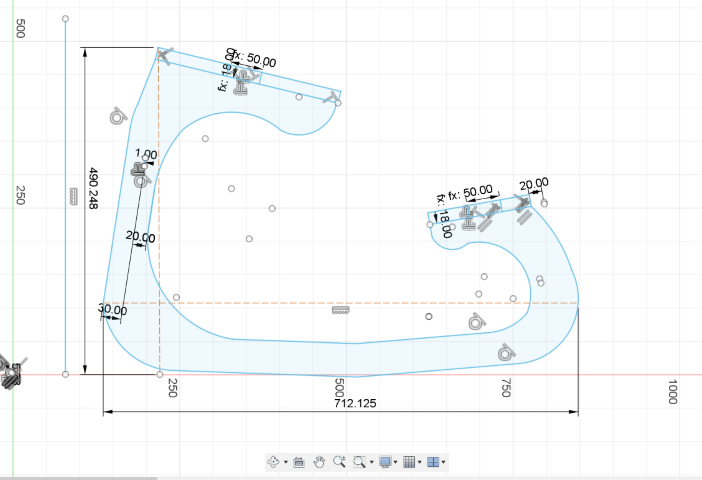
Here I was given to choose from 18mm or 12mm plywood sheets(8x4 ft). I chose to go with 18mm since it needs some strength
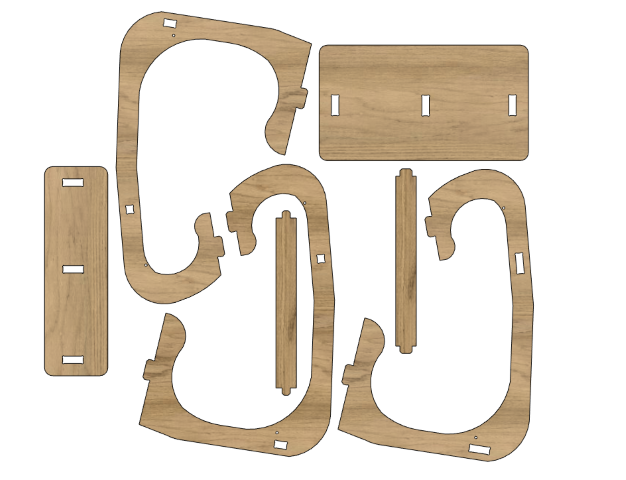
I assembled the components in fusion itself and it fitted well
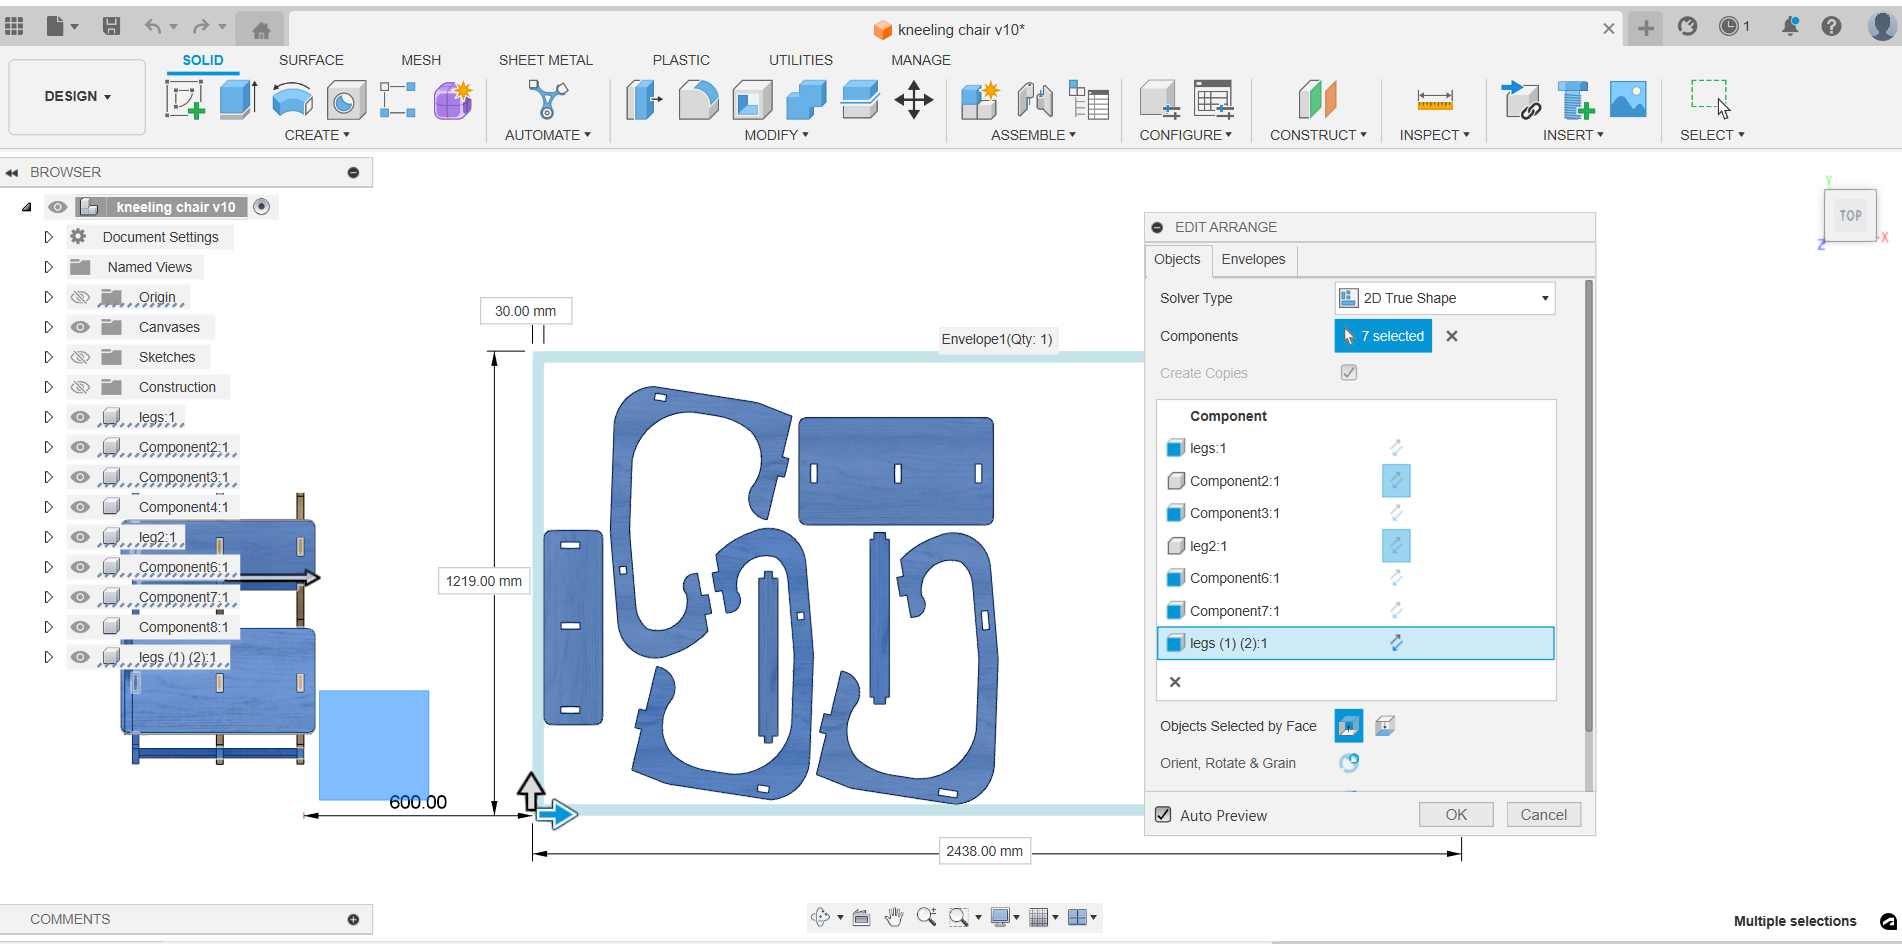
After assemling I used to the arrange tool in fusion360 to arrange it in a single sheet
Here is the rendered image of my design
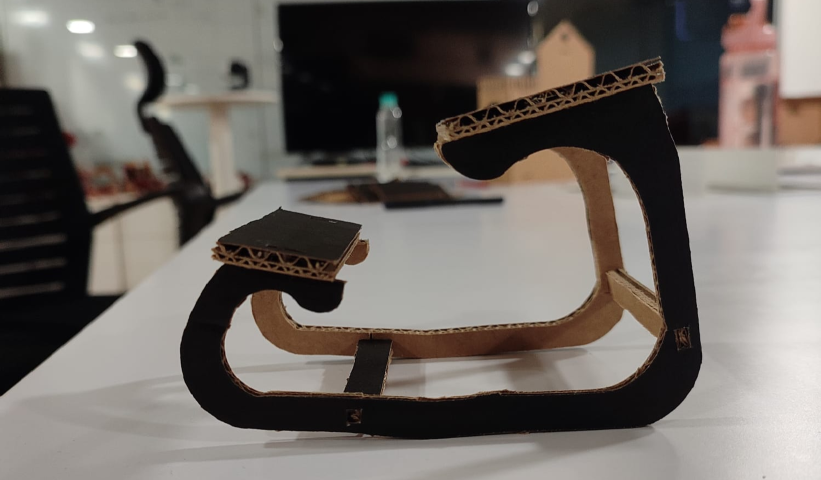
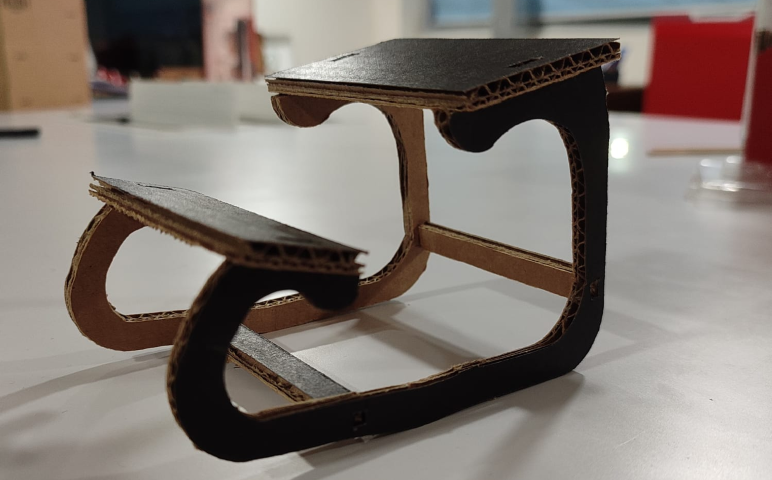
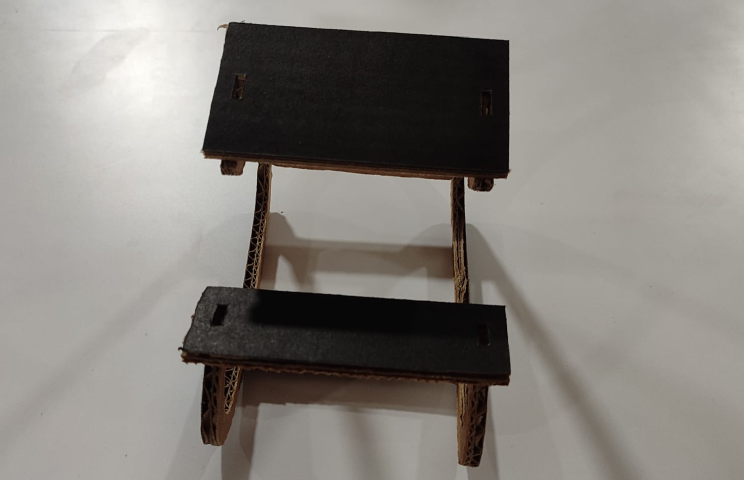
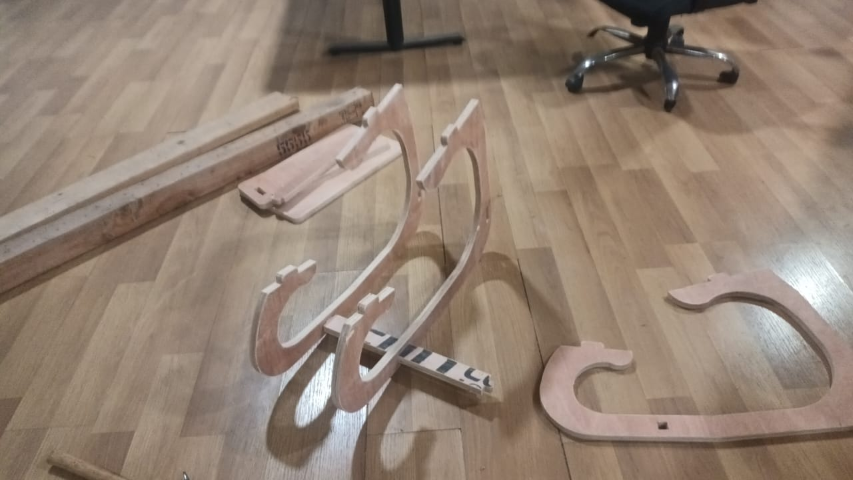
First I tried cutting it in cardboard in Zund. It looked like this
this design looked well overall but it lacked structural stability in certain points which I adjustED later
Cutting
Some design tips to keep in mind before cutting
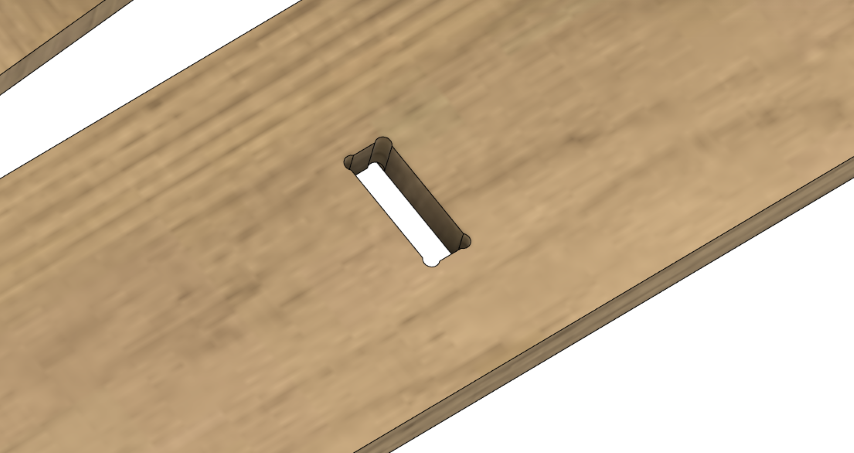
Add dogbone
, It is a specific type of fillet or corner relief added to the internal corners of a cutout in a material, typically used in CNC machining and woodworking. It's named "dogbone" because of its characteristic shape, which resembles a dog bone.
I downloaded Nift Dogbone for the same
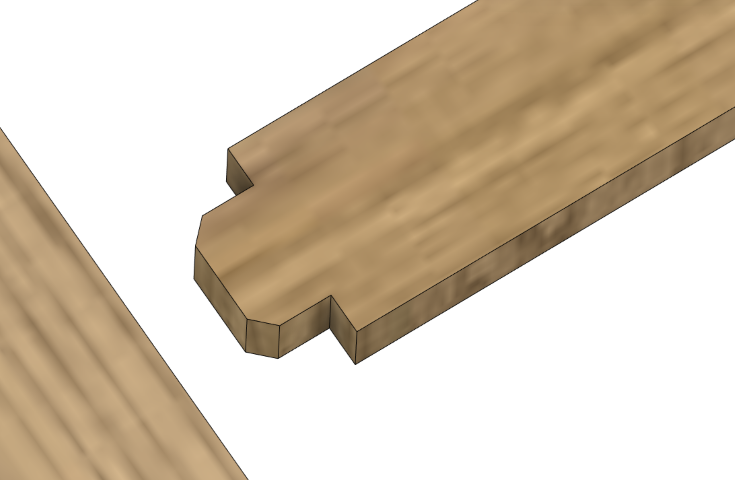
Add fillets to tabs
this will again make it insert into the slots
Arrange properly,
while minor changes can be added in Vcarve it’s better to make sure there’s optimum spacing between pieces
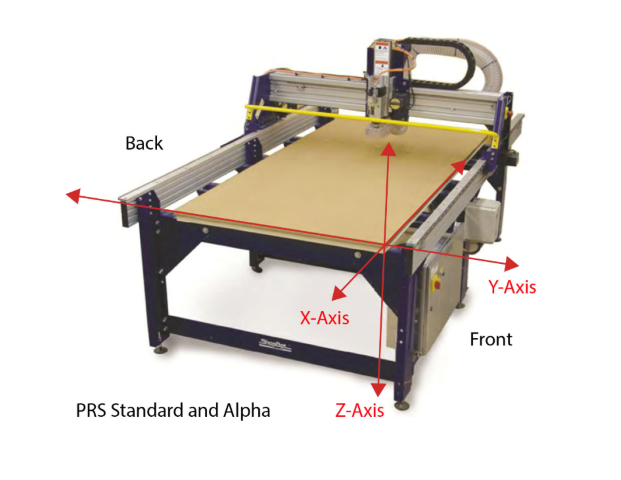
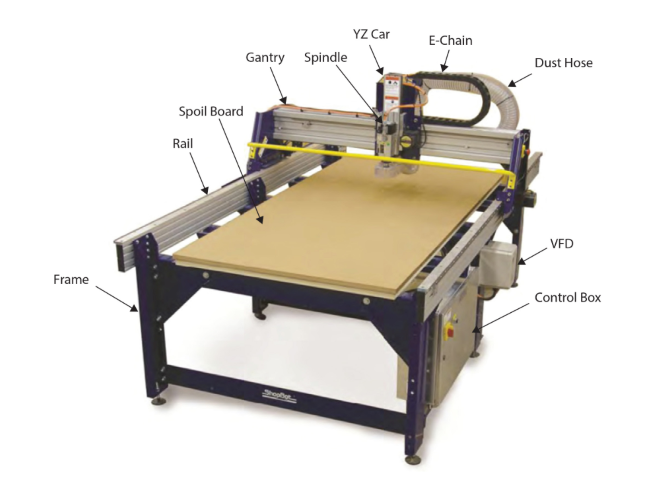
ShopBot PRSalpha
The ShopBot PRSalpha is a Computer Numerical Control (CNC) machine, which is a tool used for precise cutting and carving of materials like wood, plastic, and metals. It allows for high-speed, high-volume, and detailed work, making it ideal for a variety of projects and industries.
Size of the bed: 2434x1219mm
Safety measures
When using a ShopBot PRS Alpha CNC router, it's crucial to follow safety measures to protect yourself and others from potential hazards. Here are the key safety measures to consider:
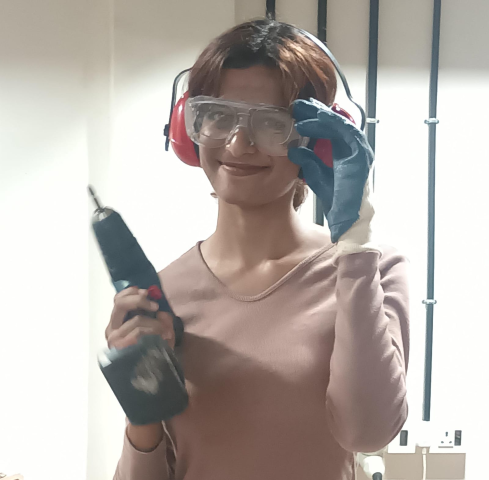
Personal Protective Equipment (PPE)
Eye Protection
: Always wear safety glasses or goggles to protect your eyes from flying debris and dust.
Hearing Protection
: Use earplugs or earmuffs to protect your hearing from the loud noise generated by the machine.
Respiratory Protection
: Wear a dust mask or respirator to avoid inhaling fine dust particles, especially when cutting materials like wood or MDF.
Appropriate Clothing
: Avoid loose clothing and tie back long hair to prevent entanglement in the machine. Wear non-slip, closed-toe shoes.
Machine Setup and Maintenance
Training
: Ensure you have proper training on how to operate the ShopBot PRS Alpha. Understand the machine’s functions, controls, and emergency stop procedures.
Inspection
: Regularly inspect the machine for any damage or wear. Check that all safety guards are in place and functioning properly.
Clean Workspace
: Keep the area around the machine clean and free of obstructions. Remove any unnecessary tools or materials.
Secure Materials
: Properly secure the workpiece using clamps or a vacuum table to prevent movement during cutting.
Operation Procedures
Emergency Stops
: Familiarize yourself with the location and operation of emergency stop buttons and procedures.
Startup Checks
: Perform a routine check before starting the machine to ensure all components are in good condition and there are no loose parts.
Supervision
: Never leave the machine unattended while it is running. Always monitor the cutting process and be prepared to stop the machine if something goes wrong.
Software Safety
: Double-check your CNC program for errors before running it. Simulate the toolpath to ensure it behaves as expected.
Handling and Materials
Material Suitability
: Ensure the material you are cutting is suitable for use with the ShopBot PRS Alpha. Some materials may produce harmful dust or fumes.
Tool Selection
: Use the correct cutting tools for the material and task. Ensure that tools are sharp and properly secured in the spindle.
Loading and Unloading
: Be cautious when loading and unloading materials to avoid pinching or crushing injuries.
Emergency Procedures
First Aid
: Have a first aid kit readily accessible in case of minor injuries.
Fire Safety
: Keep a fire extinguisher nearby and know how to use it. Be aware of the potential for fires when cutting materials that generate fine dust.
Power Isolation
: Know how to quickly disconnect power to the machine in case of an emergency.
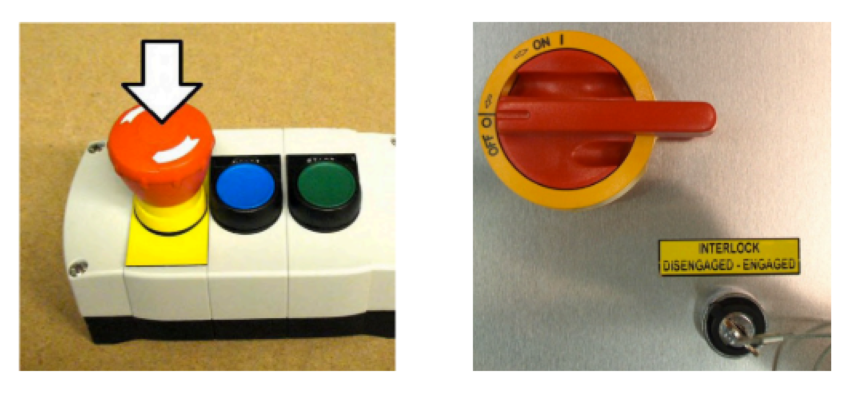
Emergency stop
To immediately stop the spindle/router and all motors, use the red emergency stop button or switch,
which will cut off power to all systems. To continue, you will need to re-zero all axes because the locations will no longer be accurate.
Tool Orientation and Direction of Axes
Main tool parts
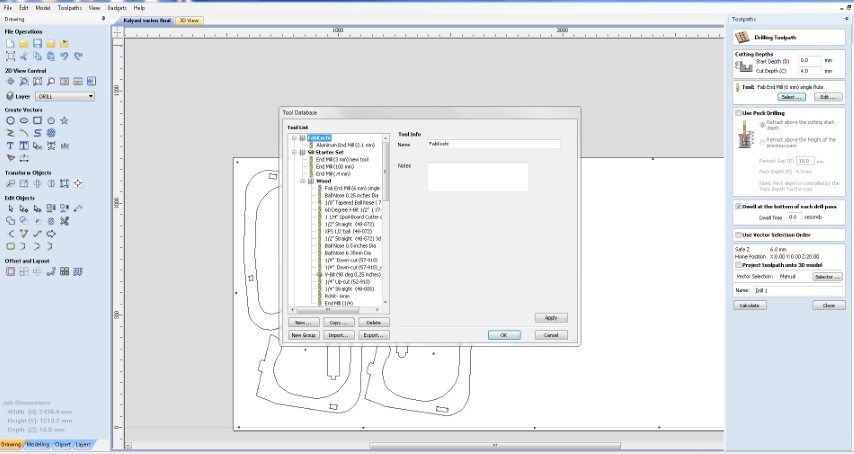
V carve
VCarve is a comprehensive software package used for CNC routing, sign making, woodcarving and engraving. It allows for the creation of complex 2D patterns with profile, pocket, drill and inlay toolpaths.
With VCarve, you can import 2D file formats to create complex designs. It also allows you to calculate 3D Roughing and Finishing toolpaths to accurately cut these shapes.
The software provides a powerful but intuitive software solution for creating and cutting parts on a CNC Router. VCarve includes tools for 2D design and editing and efficient 2D toolpath calculation.
The software can import 2D designs from other programs and also provides a full set of drawing and editing tools. The toolpath options cover all typical 2D routing operations such as Profiling, Pocketing, Auto-Inlays and Drilling.
In addition to the powerful drawing and production routing tools of VCarve, the software also includes tools to create stunning designs for your CNC router. This includes the ability to create wrapped rotary toolpaths, as well as the ability to import and machine unlimited Vectric 3D clipart or single model files.
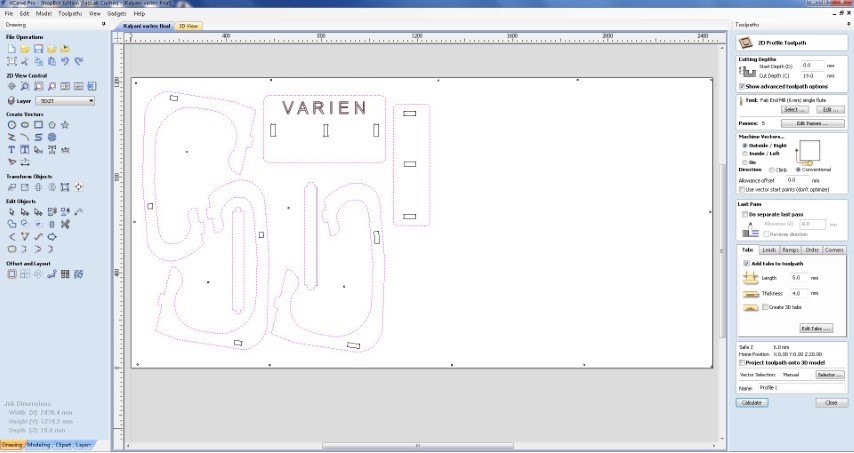
Open the dxf file in Vcarve. First step is to add the size of the job and material thickness
Selecting the tool, In this process we only use one tool which is 6mm end mill
Now we have to divide the milling into different operations. We can do this by creating different layers
1.Drilling:
Add circles in frequent distances to makes sure the plywood doesn’t move. Add this as a rill layer and assign the toolpath as drill
2.Engraving:
I wanted to engrave a text on my chair so I added text and assigned a tool path for the same. It is important to add the correct depth
3.Cutting:
Finally select the lines to be cut after ensuring there’s enough distance between the shapes. Divide it into innercut and outercut
4.
Add tabs:
To ensure the piece stays with the whole material until its fully cud it’s important to add tabs
Now these toolpaths should be saved as different cut files in the desired order
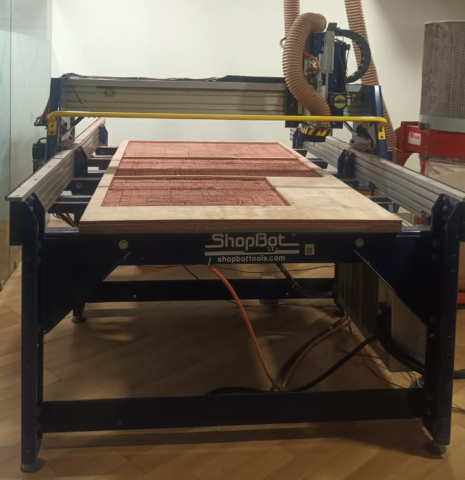
Machining
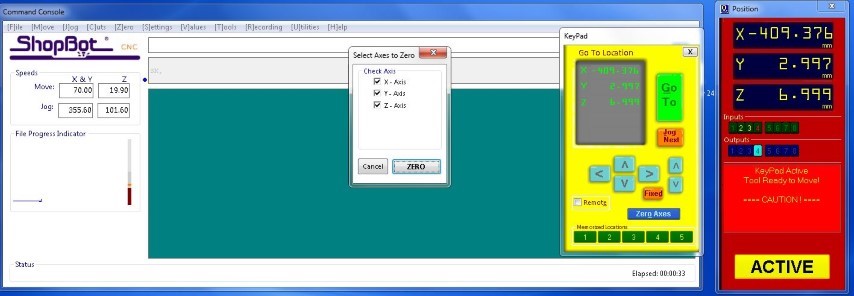
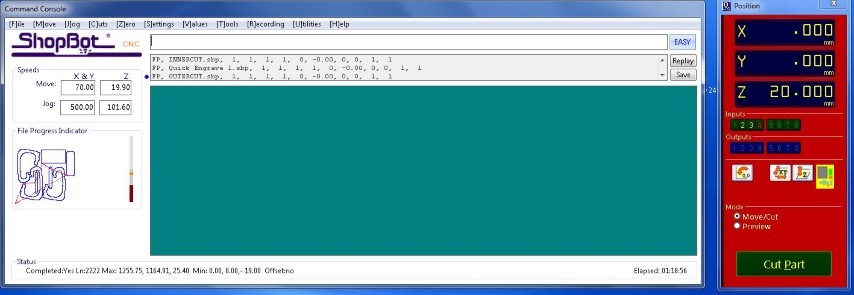
The next step is to set the origin. To do this, you can jog the module along the X and Y axes to manually set the zero position. For the Z axis, the machine includes a plate and an alligator clip. The machine detects the zero position when the clip and the metal plate come into contact, automatically setting the Z axis to zero.
Once all three axes are zeroed, click on "Cut Part" to upload the file. Then, click "Start." A pop-up box will appear, prompting you to switch on the spindle. To do this, turn the key located on the side panel of the machine once.
Cutting
Post processing
Post processing includes sanding the pieces and removing any rough-edged slivers.